
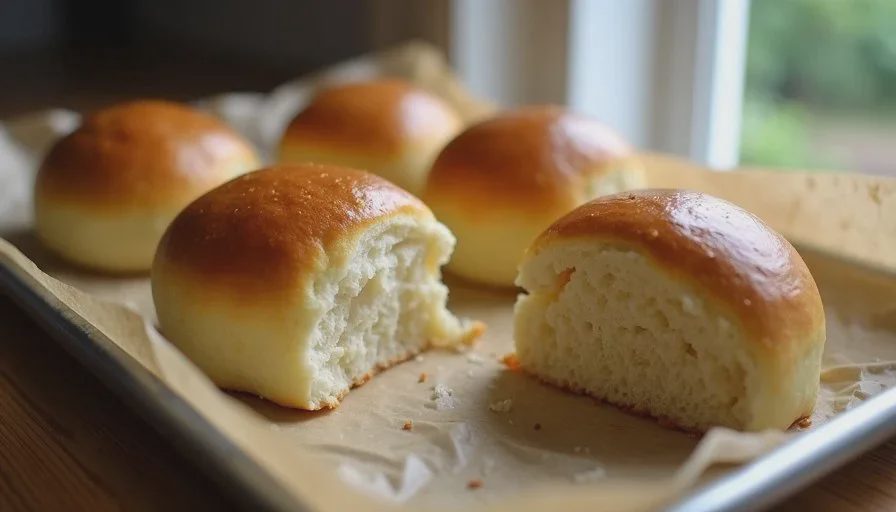
Six soft dinner rolls are a practical quantity for most small households. They provide enough bread for a meal with a little extra, yet they do not leave a large surplus that must be frozen or watched for staling. The method that follows is designed to be mixed entirely by hand, so a stand mixer is unnecessary. The dough is modest in size, the active work is limited, and the result is a tender, enriched roll with a soft crust that suits everyday dinners.
I began reducing dinner-roll formulas after noticing how often a standard batch of twelve or more created more bread than we would finish while it was still at its best. Soft rolls are at their peak the day they are baked. By the second day the crust softens further and the crumb begins to firm. A six-roll batch keeps the effort and the yield aligned with the actual table. The process fits into an ordinary afternoon or evening without requiring a free block of hours.
The dough uses basic pantry ingredients—flour, milk, butter, a little sugar, yeast, salt, and an egg. The mixing relies on a medium bowl, a flexible spatula or dough scraper, and hands. No kneading machine is required. The small quantity makes gluten development easy to feel and control.
Why Six Rolls Work Well
Most published dinner-roll recipes are written for larger yields. They assume a family gathering or a desire for leftovers. In a household of two or three, that volume often exceeds what will be eaten while the rolls are still soft and fresh. Scaling to six rolls removes the excess while still producing a complete contribution to the meal.
The smaller dough is easier to mix by hand. A full batch can become tiring to knead without a machine; six rolls stay manageable from start to finish. Bulk fermentation and proofing take place in a modest bowl or on a small tray, so counter space remains free. Baking fits on a single sheet pan with room for air circulation, which helps the rolls brown evenly.
Timing is also more flexible. The active steps—mixing, a few folds or a short knead, shaping, and baking—can be distributed around other tasks. An overnight cold proof is possible if the schedule requires it, though a same-day timeline works well for most kitchens.
These practical advantages do not change the goal of the bread. The rolls should still be soft, slightly enriched, and pleasant to tear or slice. The reduced quantity simply makes that result easier to achieve and finish on a normal day.

Ingredients and Their Roles
The ingredient list is short and familiar.
All-purpose flour provides the structure. A moderate protein level is ideal; bread flour can be used if a slightly chewier roll is preferred, but all-purpose keeps the crumb tender. Measuring by weight improves consistency, though careful volume measuring works if a scale is not available.
Warm milk hydrates the flour and contributes to softness. Whole milk gives the best richness, but 2% also works. The milk should be warm to the touch—roughly 100–110°F—so it activates the yeast without killing it.
Butter adds flavor and tenderness. Softened butter is incorporated during mixing so it distributes evenly. Melted butter can be used, but softened butter produces a slightly finer crumb in this style of roll.
A small amount of sugar feeds the yeast and helps browning. It also contributes to the soft texture. The quantity is modest; these are not sweet rolls.
Yeast—instant or active dry—provides the lift. Instant yeast can be mixed directly with the dry ingredients. Active dry yeast benefits from a brief proof in the warm milk. Either type works; the important point is that the yeast is fresh and active.
Salt balances the flavor and strengthens the gluten network. It should not be omitted or reduced significantly.
One egg enriches the dough, improves color, and helps create a soft, cohesive crumb. The egg should be at room temperature so it incorporates smoothly.
These ingredients are ordinary. Their reliability comes from consistent measuring and attention to dough temperature and feel rather than from specialty items.
Mixing the Dough by Hand
Hand mixing is straightforward at this scale.
Combine the warm milk, yeast, and a pinch of the sugar in a medium bowl if using active dry yeast, and let it stand until foamy. If using instant yeast, the milk can be added directly with the other wet ingredients.
Add the remaining sugar, the egg, and the softened butter. Stir until the mixture is roughly combined. Add the flour and salt. Stir with a spatula or wooden spoon until a shaggy dough forms and no dry flour remains. The dough will look rough at this stage.
Turn the dough out onto a lightly floured surface or continue in the bowl if space allows. Knead gently by hand for 5 to 8 minutes. The motion is a simple press-and-fold rather than an aggressive slap. The dough will gradually become smoother and more elastic. It should feel soft and slightly tacky but not sticky enough to leave large amounts of residue on the hands. If it is very sticky, add flour a teaspoon at a time. If it feels tight and dry, wet the hands and continue.
The small quantity makes it easy to feel when the dough has enough strength. It should hold a shape, stretch without tearing immediately, and show some smoothness on the surface. Perfect windowpane development is not required for soft rolls; adequate gluten for a tender yet structured crumb is enough.
Place the dough in a lightly greased bowl, cover it, and let it rise until roughly doubled. In a kitchen around 72–75°F this usually takes 60 to 90 minutes. The dough is ready when a gentle finger dent remains rather than springing back completely.
Shaping and Final Proof
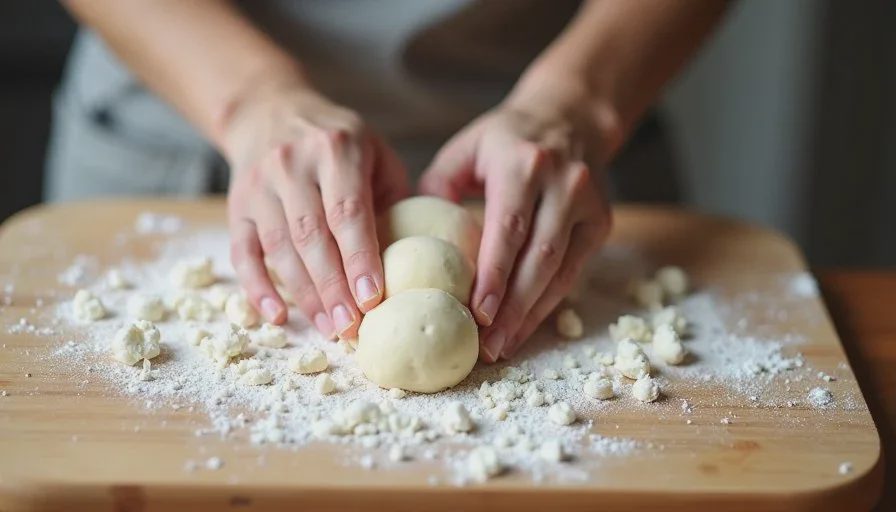
Once the dough has risen, turn it out and divide it into six equal pieces. A bench scraper or knife works well. For even rolls, weigh the total dough and divide by six. Shape each piece into a smooth ball by pulling the edges under and pinching the seam at the bottom. The surface should be taut.
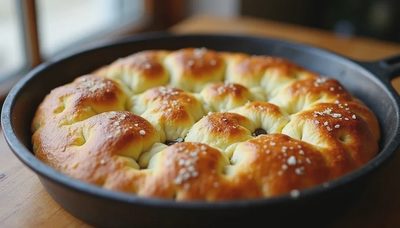
Arrange the rolls on a parchment-lined baking sheet, leaving space between them so they can expand without merging completely. For pull-apart rolls, place them closer so they touch during the final rise. For individual rolls, leave more space.
Cover the tray and let the rolls proof until they look puffy and a gentle dent fills back slowly. This usually takes 30 to 50 minutes depending on temperature. Over-proofing produces rolls that spread and bake up flat; under-proofing produces dense interiors. The visual and tactile cues are more reliable than the clock.
If the schedule requires a pause, the shaped rolls can be refrigerated for a few hours or overnight. Bring them back toward room temperature and allow additional proofing time before baking.
Baking and Finishing
Preheat the oven to 375°F. A moderate temperature allows the rolls to expand fully and brown evenly without hardening the crust too quickly.
Bake until the tops are golden and the internal temperature reaches approximately 190–195°F. Total time is usually 15 to 20 minutes. Rotate the sheet halfway through if the oven has hot spots. The rolls should sound hollow when tapped on the bottom and feel light for their size.
For a softer crust, brush the warm rolls with melted butter as soon as they come out of the oven. For a slightly shinier finish, an egg wash can be applied before baking. Both are optional; the rolls are good without either.
Cool the rolls on a rack for at least 10 to 15 minutes before serving. They are best eaten the day they are baked. If leftovers remain, store them in an airtight container or bag at room temperature for a day, or freeze them for longer storage. Reheating in a low oven restores much of the softness.
Common Points of Friction and Adjustments
A few ordinary issues appear when bakers first make soft rolls by hand.
Dough that feels too sticky is usually corrected with a light dusting of flour during kneading and shaping. Adding large amounts of flour makes the rolls tough. A slightly tacky dough is preferable to a dry one.
Dense rolls often result from insufficient rising time or yeast that is no longer active. Checking the yeast with a small proof in warm liquid before mixing confirms activity. Allowing the dough to rise until it is truly light and airy prevents a heavy crumb.
Rolls that brown too quickly while the interior lags can be moved to a lower rack or tented loosely with foil for the final minutes. Confirming oven temperature with a thermometer removes one common source of uneven baking.
Dry or firm rolls the next day are normal for this style of bread. Soft rolls stales faster than leaner crusty breads. Freezing any extras on the day of baking preserves the texture better than leaving them at room temperature for multiple days.
These adjustments are incremental. The six-roll format makes testing changes low-risk and low-waste. One batch supplies clear information for the next.
Fitting the Process into Ordinary Days
The active work for six rolls is modest. Mixing and kneading take about 15 minutes. Shaping takes another 5 to 10. The rises can happen while other meal preparations are underway. Baking is short. The entire process can be started in the afternoon and finished by dinner, or stretched with a cold proof if the day is busy.
No stand mixer is required, which keeps the method accessible in kitchens that do not have one or that prefer not to use one for small quantities. The dough volume is small enough that hand mixing is efficient rather than laborious.
Six soft dinner rolls provide enough bread for a meal without creating a surplus that demands attention later. The crumb stays tender, the crust stays soft, and the process stays within the limits of an ordinary home kitchen and an ordinary schedule. That balance is what makes the small batch useful.
Small batch, real life, something worth sharing.


No notes yet — write the first one.